| github_assets | ||
| website | ||
| .dockerignore | ||
| .gitattributes | ||
| .gitignore | ||
| build.sh | ||
| docker-compose.yml | ||
| Dockerfile | ||
| drop.sql | ||
| LICENSE | ||
| package-lock.json | ||
| README.md | ||

Rugplay.com - the fake crypto simulator.
Privacy Policy | Terms of Service | License | YouTube video
About
Rugplay is a realistic cryptocurrency trading simulator that lets you experience the risks and mechanics of decentralized exchanges without real financial consequences. Create coins, trade with liquidity pools, and learn about "rug pulls" in a... relatively safe environment :)
Features
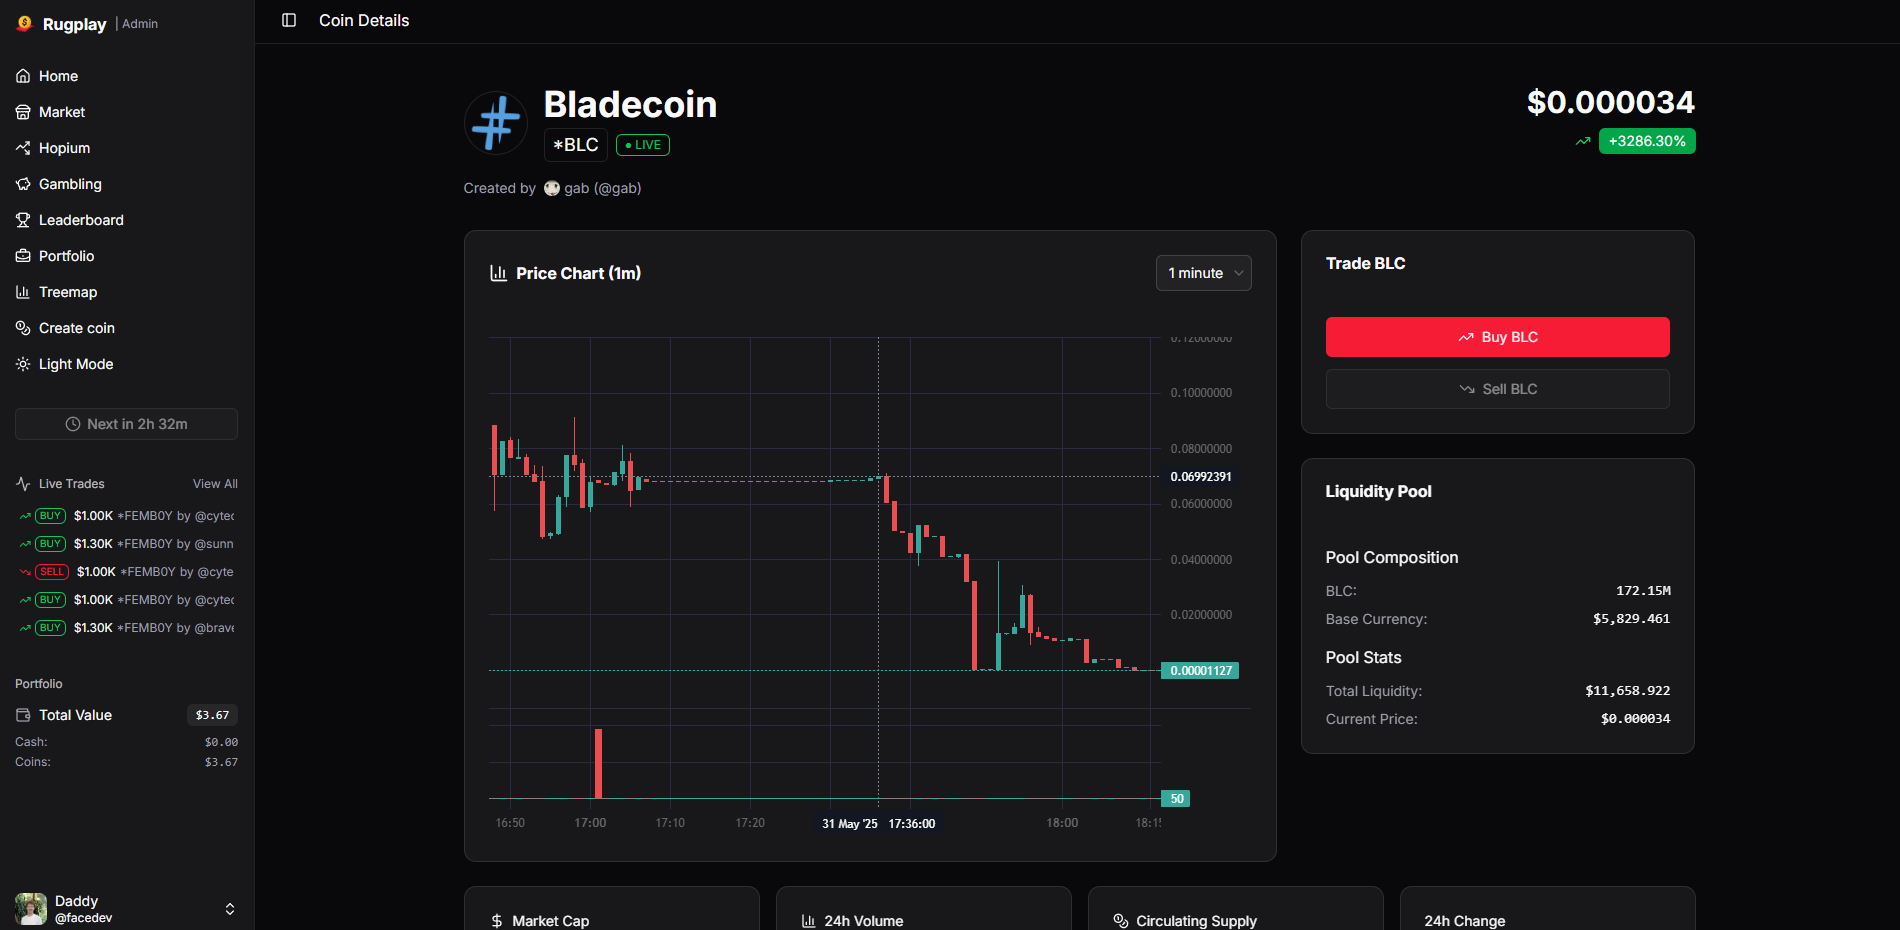
- 🪙 Create coins
- 🟢 Buy coins
- 🔴 Sell coins
- ⚖️ Bet on questions (similar to Polymarket)
- 🎲 Gamble it all
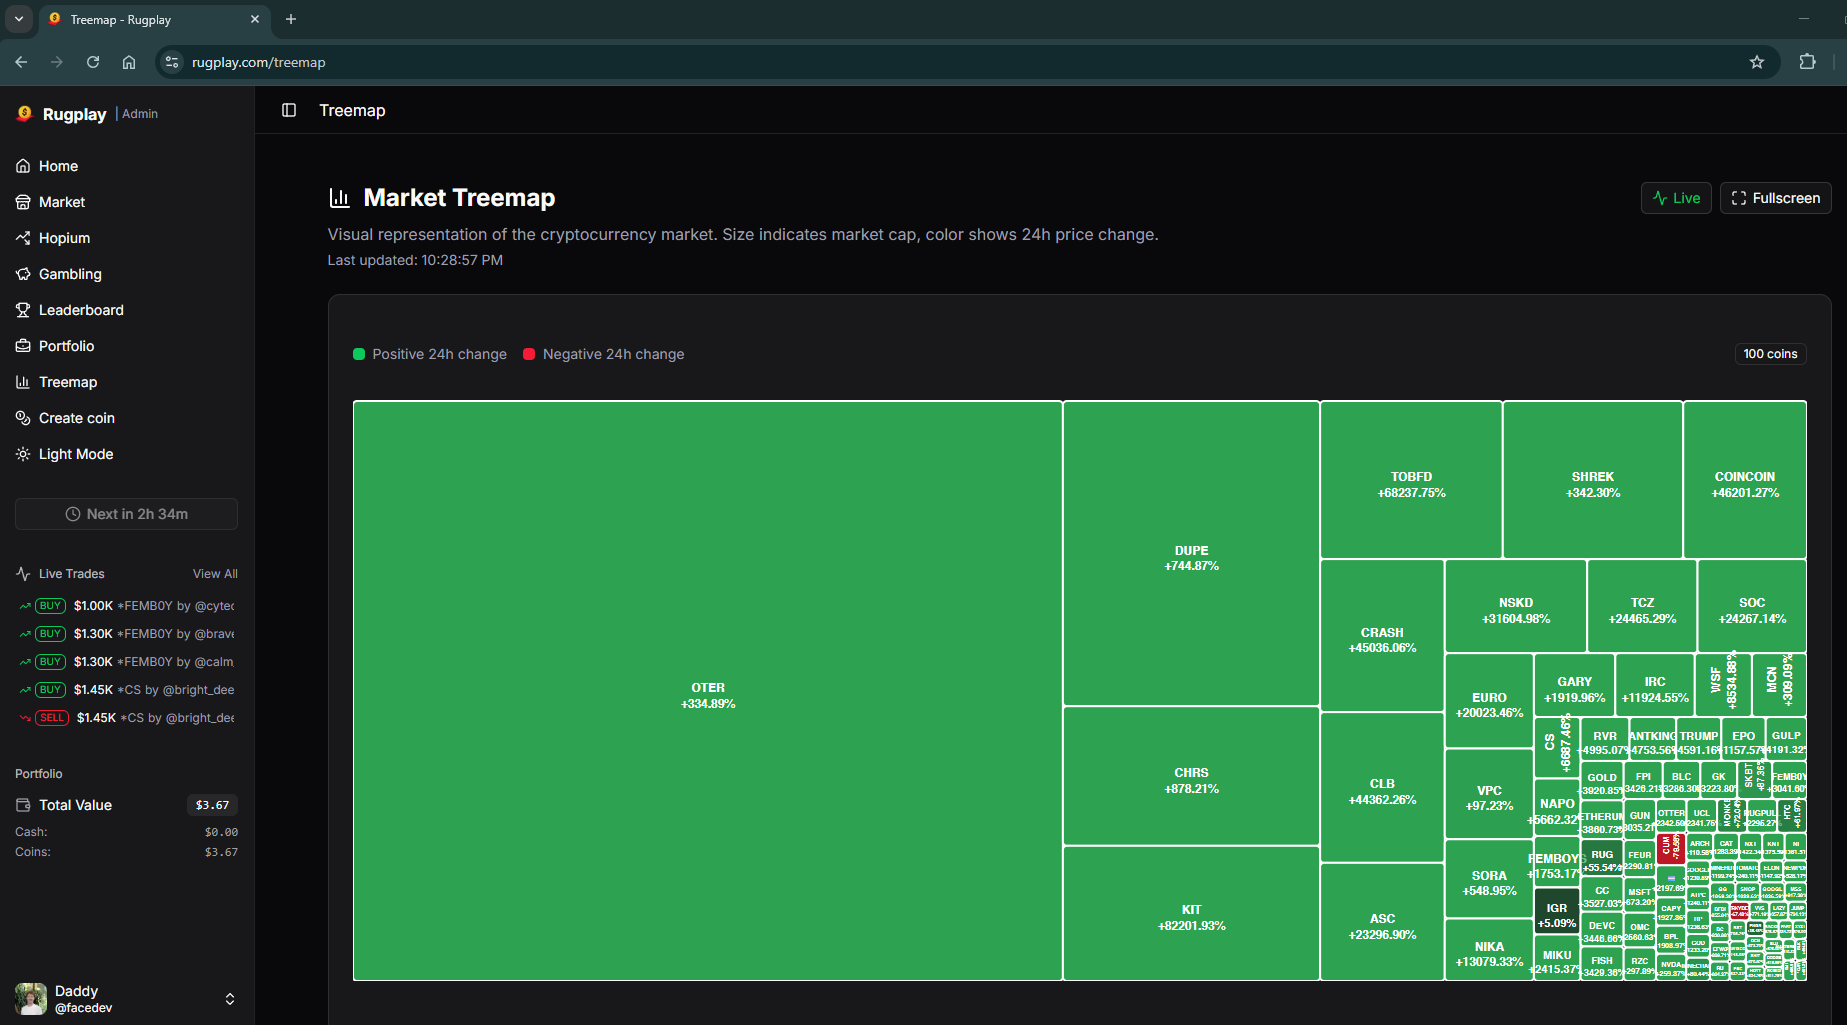
- 📊 View a Treemap graph of the entire market
- 🏆 Compete on leaderboards
Development Setup
Prerequisites
Before you begin, make sure you have the following installed:
- Node.js (LTS version recommended)
- Bun (for websocket server)
- Docker (for running Redis and PostgreSQL)
Getting Started
-
Clone the repository
git clone https://github.com/outpoot/rugplay.git cd rugplay -
Set up Redis
Create a Redis Docker container:
docker run -d --name rugplay-redis -p 6379:6379 -v rugplay_redisdata:/data --restart unless-stopped redis:8-alpine redis-server --save 60 1Alternative: You can also download and install Redis directly for your operating system, or use a managed Redis service such as Redis Cloud.
-
Set up PostgreSQL
You have two main options for your Postgres database:
-
Run Postgres locally with Docker:
docker run -d --name rugplay-postgres -e POSTGRES_USER=pguser -e POSTGRES_PASSWORD=pgpass -e POSTGRES_DB=rugplay -p 5432:5432 -v rugplay_pgdata:/var/lib/postgresql/data --restart unless-stopped pgvector/pgvector:pg16 -
Use a managed cloud Postgres provider: Services like Supabase, Neon, or others let you create a Postgres database online, often with a free tier. Simply grab your connection details (host, user, password, database name) from your provider.
After your database is running, update your
DATABASE_URLin the.envfile to point to your Postgres instance.If you are running Postgres locally, you can seed the database with:
docker exec -it rugplay-postgres psql -d rugplay -U pguserThen, copy and paste the SQL from the migration files (e.g.
website/drizzle/0000_crazy_bloodstrike.sql). -
-
Configure Google OAuth
- Go to Google Auth Platform dashboard
- Create a new client:
- Application type: "Web application"
- Name: Your choice
- Authorized JavaScript origins: Can be left empty
- Authorized redirect URIs:
-
Configure Environment Variables
cd website
cp .env.example .env
Edit
.envwith your values. Example:# --- Database --- DATABASE_URL=postgres://pguser:pgpass@localhost:5432/rugplay # PostgreSQL connection string POSTGRES_USER=pguser # PostgreSQL username (should match Docker config) POSTGRES_PASSWORD=pgpass # PostgreSQL password (should match Docker config) POSTGRES_DB=rugplay # PostgreSQL database name (should match Docker config) # --- Redis --- REDIS_URL=redis://localhost:6379 # Redis connection string # --- Auth --- PRIVATE_BETTER_AUTH_SECRET=your_secret_here # Any alphanumeric string for session encryption PUBLIC_BETTER_AUTH_URL=http://localhost:5173 # For development, use http://localhost:5173. For production, use http://localhost:3002 # --- Google OAuth --- GOOGLE_CLIENT_ID=your_google_client_id GOOGLE_CLIENT_SECRET=your_google_client_secret # --- Websocket --- PUBLIC_WEBSOCKET_URL=ws://localhost:8080 # URL of the websocket server # --- Optional: AWS (for additional features) --- AWS_ACCESS_KEY_ID=your_aws_access_key AWS_SECRET_ACCESS_KEY=your_aws_secret_key AWS_REGION=us-east-1 # --- Optional: OpenRouter (for AI features) --- OPENROUTER_API_KEY=your_openrouter_api_keyNotes:
- For production, change
PUBLIC_BETTER_AUTH_URLtohttp://localhost:3002or your deployed domain. - The
DATABASE_URLshould match your Postgres Docker container settings. - The
REDIS_URLshould match your Redis Docker container settings. - AWS and OpenRouter variables are optional and only needed for advanced features.
- For production, change
-
Install Dependencies
Set up the websocket server:
cd website/websocket
bun install
Set up the main website:
cd ../
npm install --include=dev
Running the Application
-
Start the websocket server
cd website/websocket bun run src/main.ts -
Start the main website (Development Mode)
In a new terminal:
cd website
npm run dev
The development server will be available at http://localhost:5173
Production Deployment
Using Docker (Recommended)
-
Build and start with Docker:
./build.shThis will automatically start all required services, including the Database, Redis and the websocket server, as Docker containers. You do not need to run the websocket server manually when using Docker Compose for deployment.
-
The app will be available at http://localhost:3002
Manual Deployment
-
Build the website:
cd website npm run build npm run preview -
Start the websocket server:
cd website/websocket
bun run src/main.ts
License
This project is licensed under the Creative Commons Attribution-NonCommercial 4.0 International License (CC BY-NC 4.0). See the LICENSE file for details.